- Products & services Products & services
- Resources ResourcesLearning
- Learning
- Identity University Get technical training to ensure a successful implementation
- SailPoint professional certifications & credentials Advance your career or validate your identity security knowledge
- SailPoint recertification program Get recertified by demonstrating ongoing learning
- Training onboarding guide Make of the most of training with our step-by-step guide
- Training FAQs Find answers to common training questions
- Community Community
- Compass
- :
- Discuss
- :
- Community Wiki
- :
- IdentityIQ Wiki
- :
- Managing user access - A guide for end users
- Article History
- Subscribe to RSS Feed
- Mark as New
- Mark as Read
- Bookmark
- Subscribe
- Printer Friendly Page
- Report Content to Moderator
Managing user access - A guide for end users
Managing user access - A guide for end users
- About this article
- Whose access can you manage?
- Where to manage user access
- Select users
- Manage access
- Add access
- Permitted roles
- Selecting or creating accounts
- Remove access
- Review and submit
- Policy violations
- Submitting the request
- Additional information
About this article
This article is intended to be a model for how you can explain and/or demonstrate how to manage user access in IdentityIQ to the end users who will be using this feature. Feel free to copy, modify, and re-purpose any of this content for your own internal use.
We recommend that you create your own screen shots and/or video clips, to reflect the look and feel of your own instance of IdentityIQ, and the specific options you configure for your access requests.
This article covers how to request or remove user access for yourself and others. Reviewing and certifying user access is a separate topic; that is managed through certifications and access reviews.
Whose access can you manage?
In IdentityIQ, permissions control who you can manage access for. Some users can manage access only for themselves, while other users can manage access for themselves and others. For example, managers can typically manage access only for those in their reporting hierarchy, but users such as system administrators or IT personnel may be able manage access for entire departments or even for every user in the system.
Where to manage user access
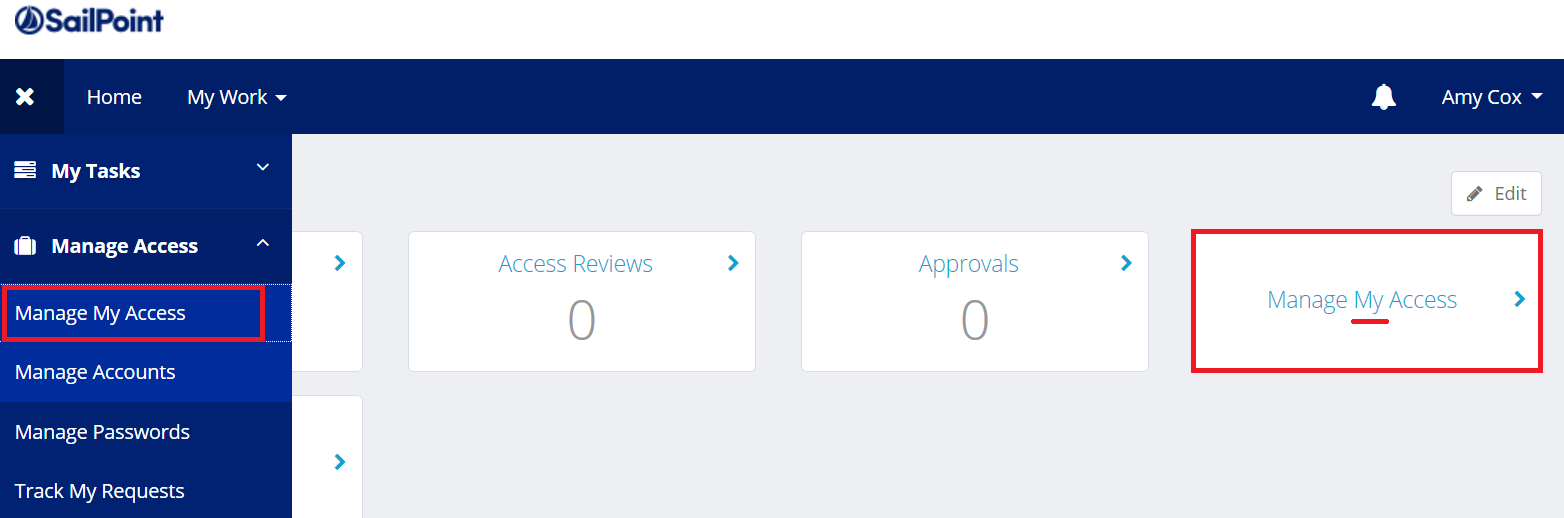
The Manage Access feature can be accessed via a card on your home page, or from the Quicklinks menu.
Users who are able to manage access for both themselves and others have a Manage User Access Quicklink menu item and card on the home page:

Users who can manage only their own access see a similar menu item and card, for their own access only.
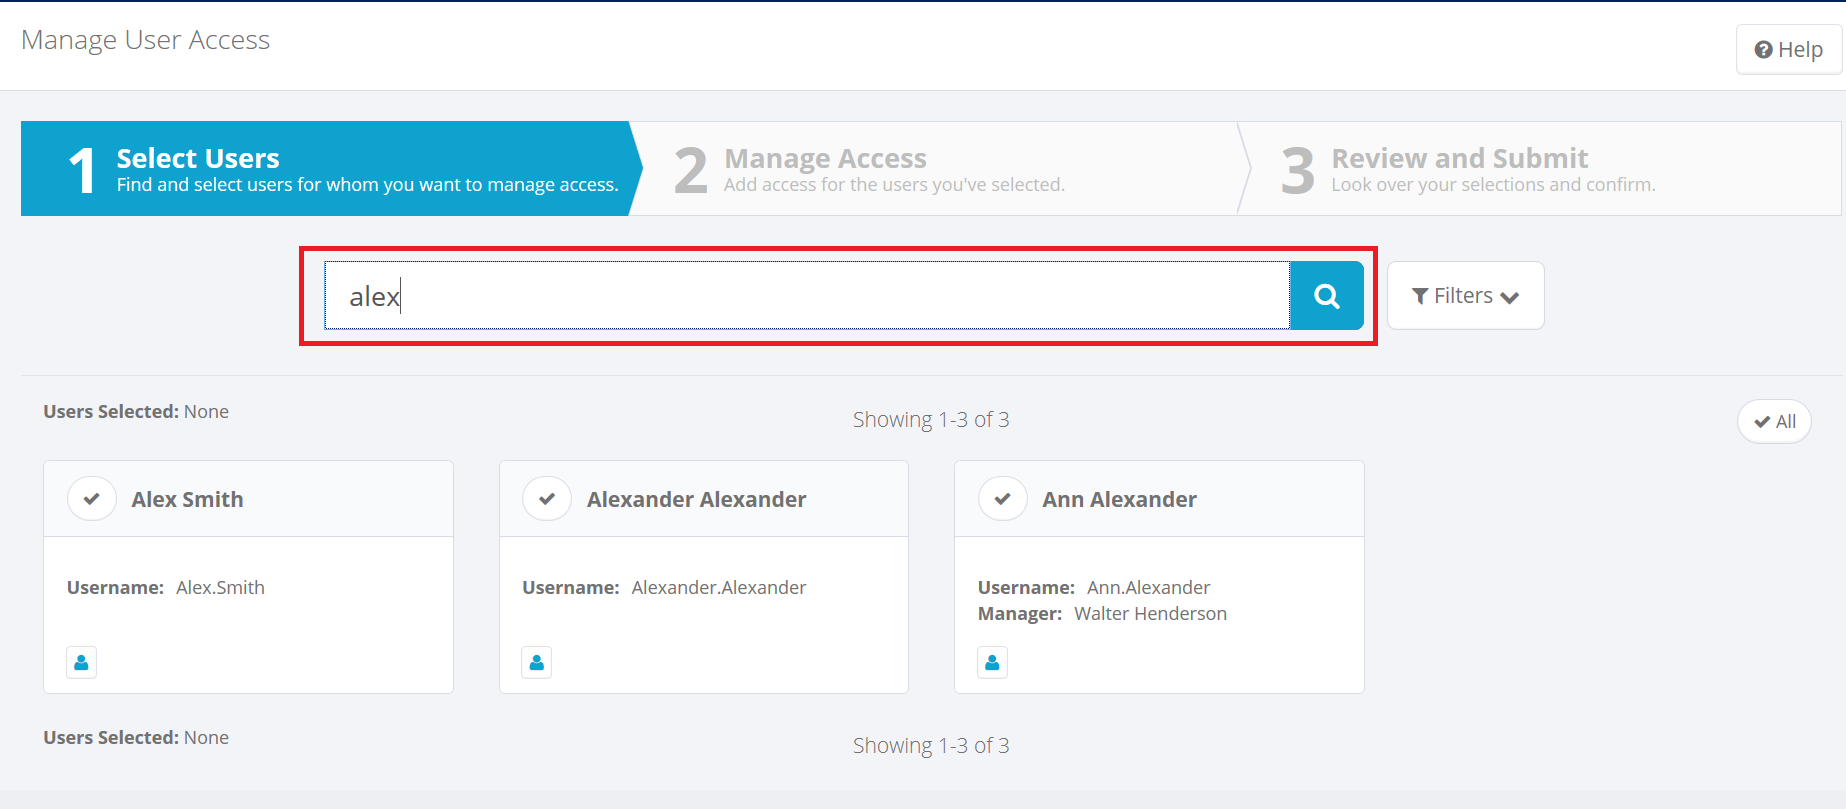
Select users
Note: Only users who are authorized to request access for others see the “Select Users” page. If you can only request access for yourself, this page does not appear, and you begin the access request process at the "Manage Access" tab.
The users that you are authorized to request or remove access for are listed; for example, managers will typically see only the users in their own reporting hierarchy, whereas system administrators may see every user in the system.
Search for Users: Type the text to search for, then press Enter or click the magnifying glass. The search returns all users with attributes (such as name or description) that start with the search term. (The specifics of which user attributes can be searched is configured by your system administrator.)
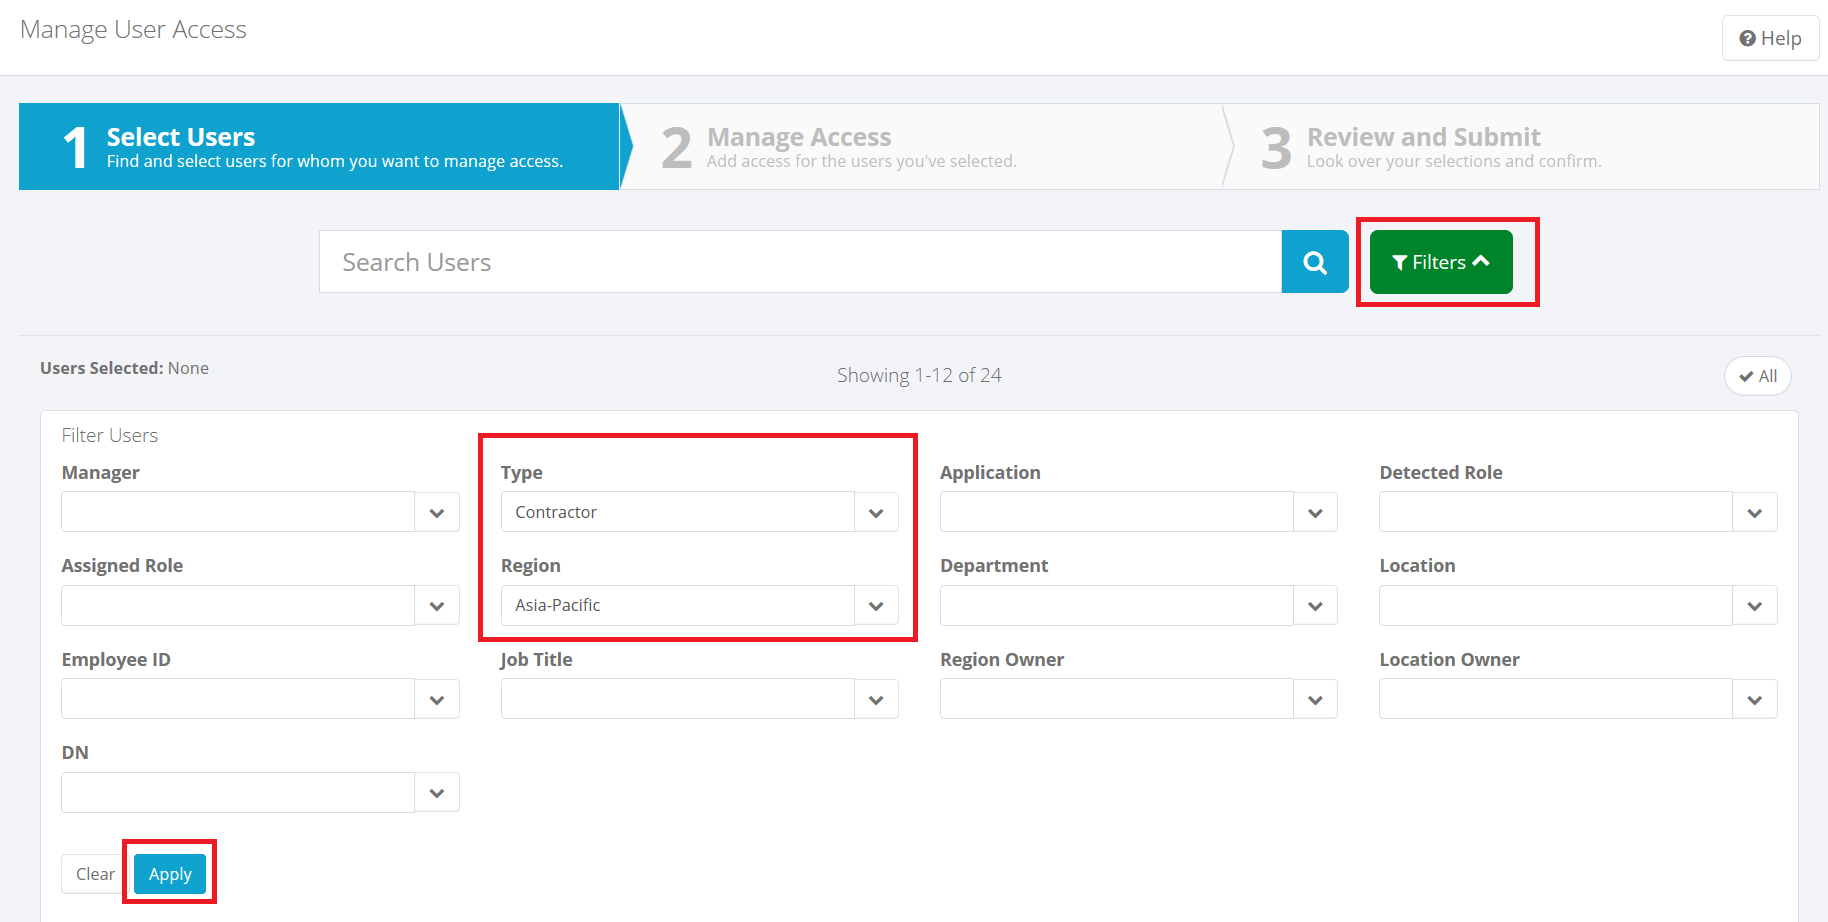
Filter Users: Click Filters to choose and apply filter criteria. When you have chosen your criteria, click Apply. When filtering is applied, the Filter button on the Select Users page turns green, to alert you that you are seeing a filtered subset of users. To clear filtering, click the Filters button again and click Clear.
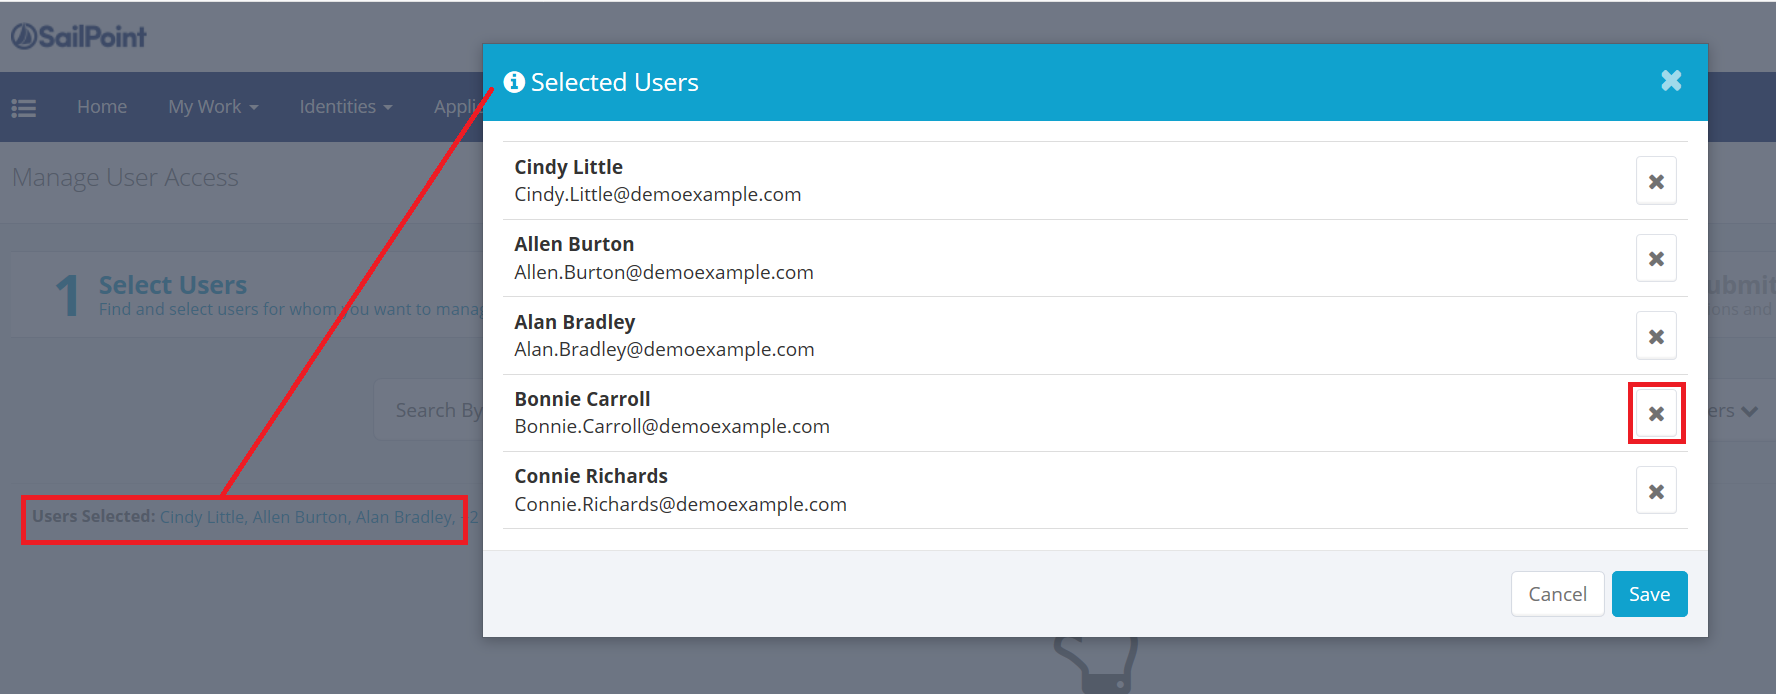
Select or Deselect Users: Click the checkmark icon for each user you want to select. You can also click the All button to select all users (maximum of 100). The Users Selected list, just below the navigation bar, shows the users you have selected; you can click on this list of users at any point in the access request process to remove users from the selection.
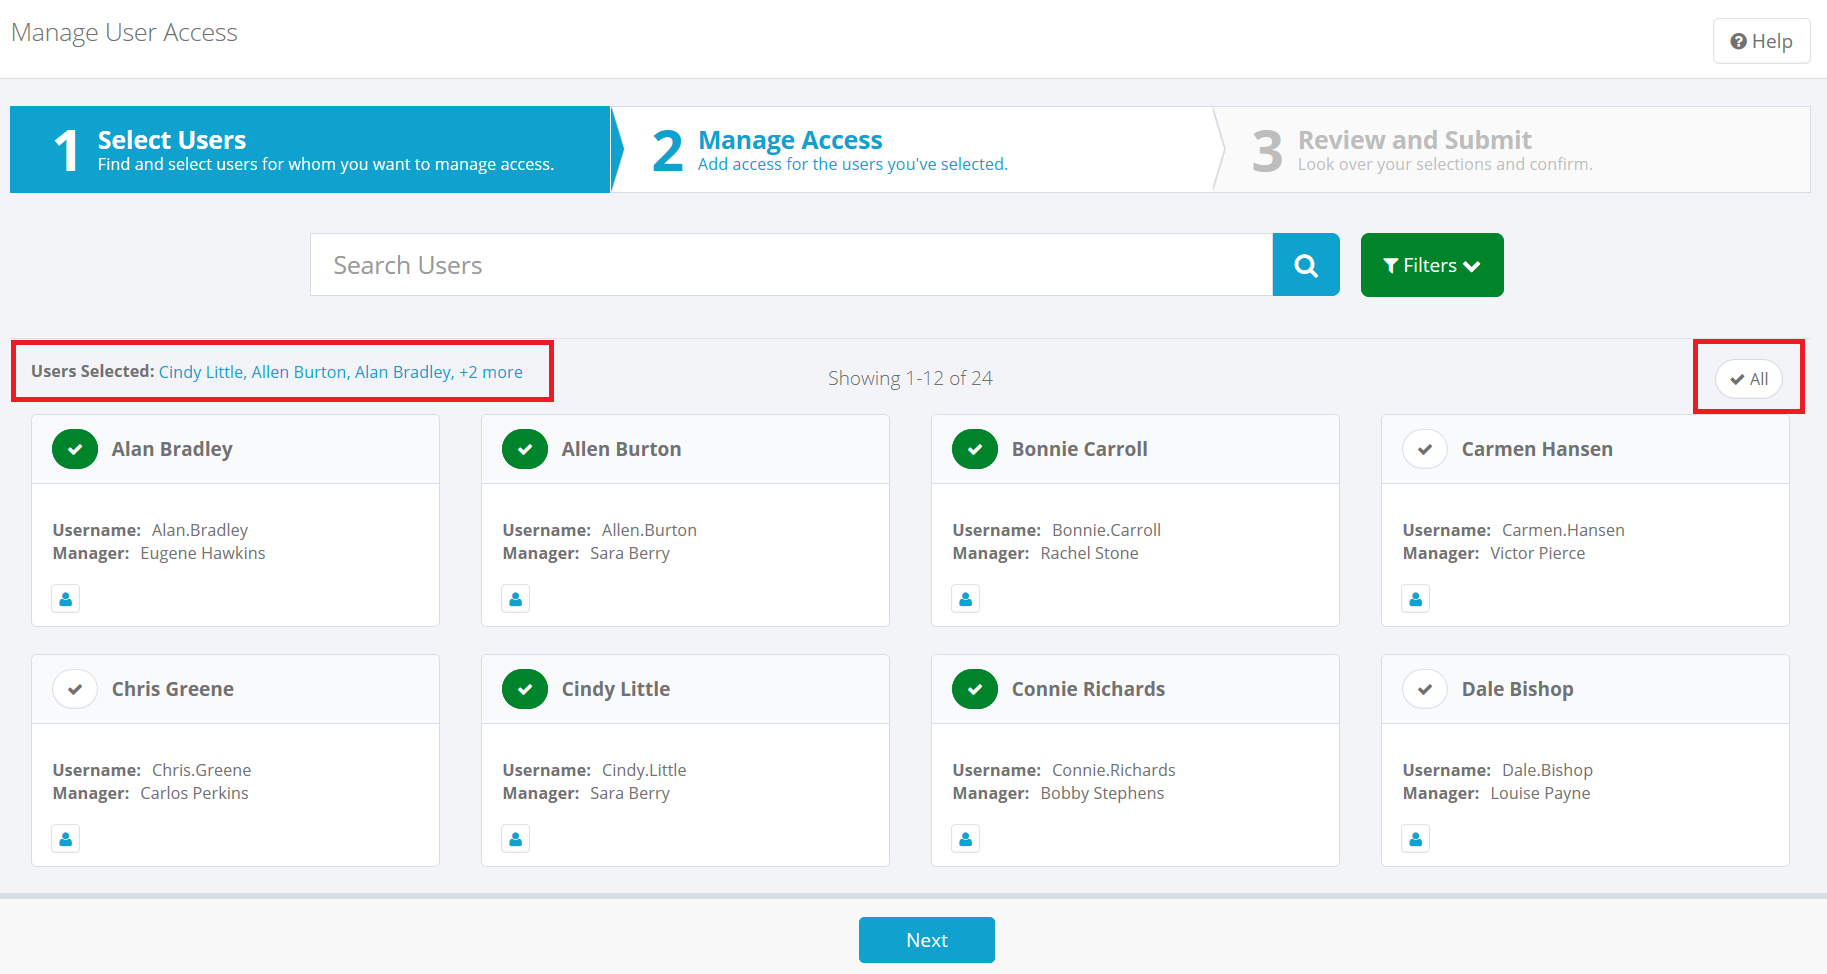
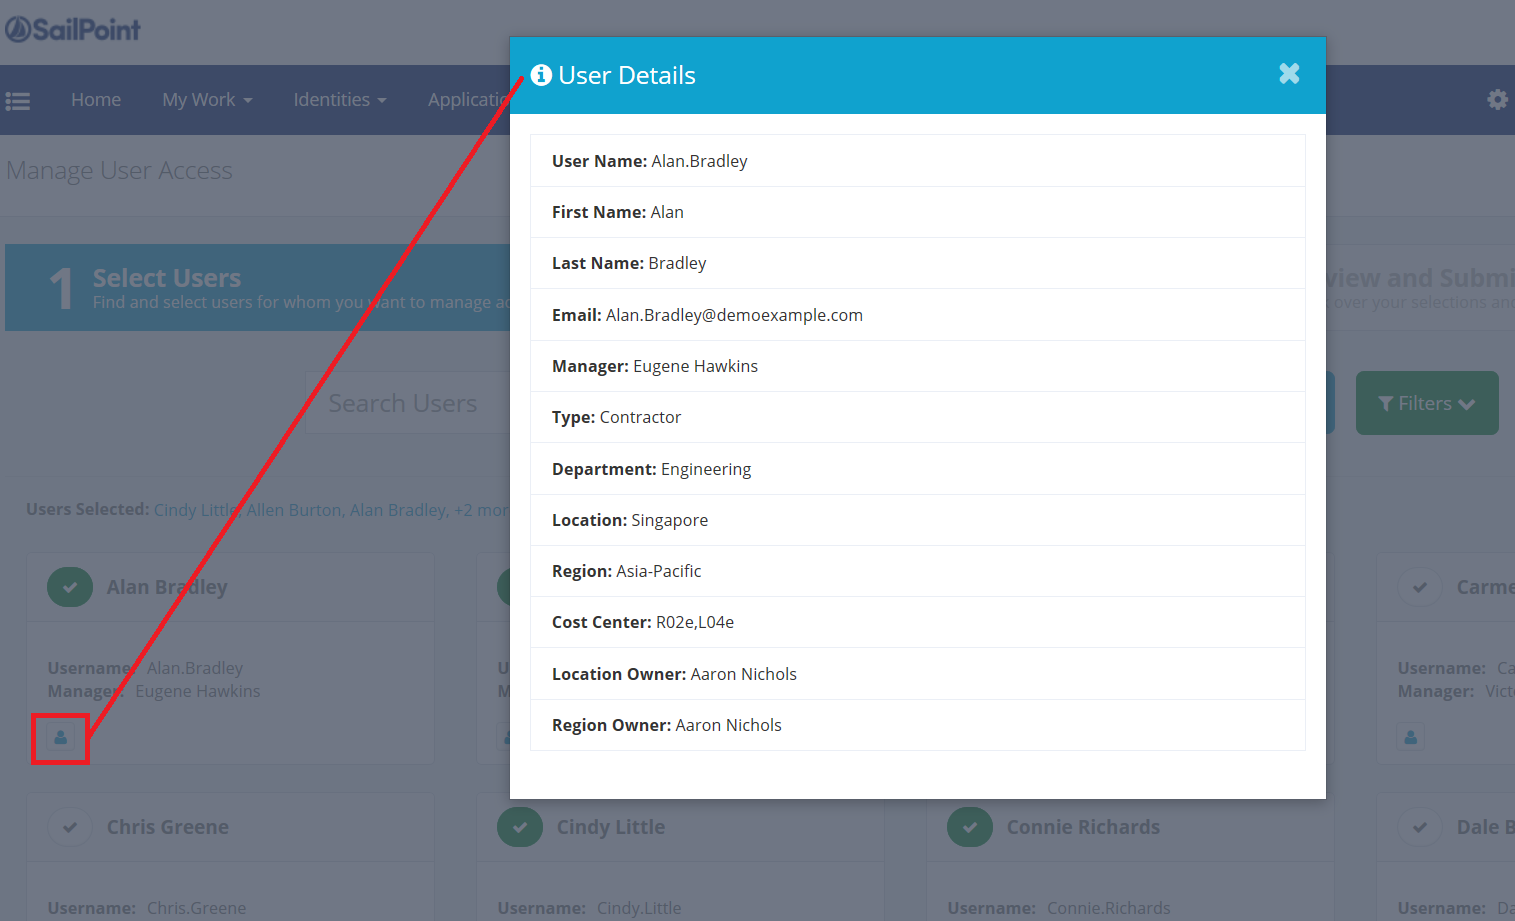
To see user details: Click the person icon on any user card to see details about the user.
Click Next to move on to the Manage Access page.
Manage access
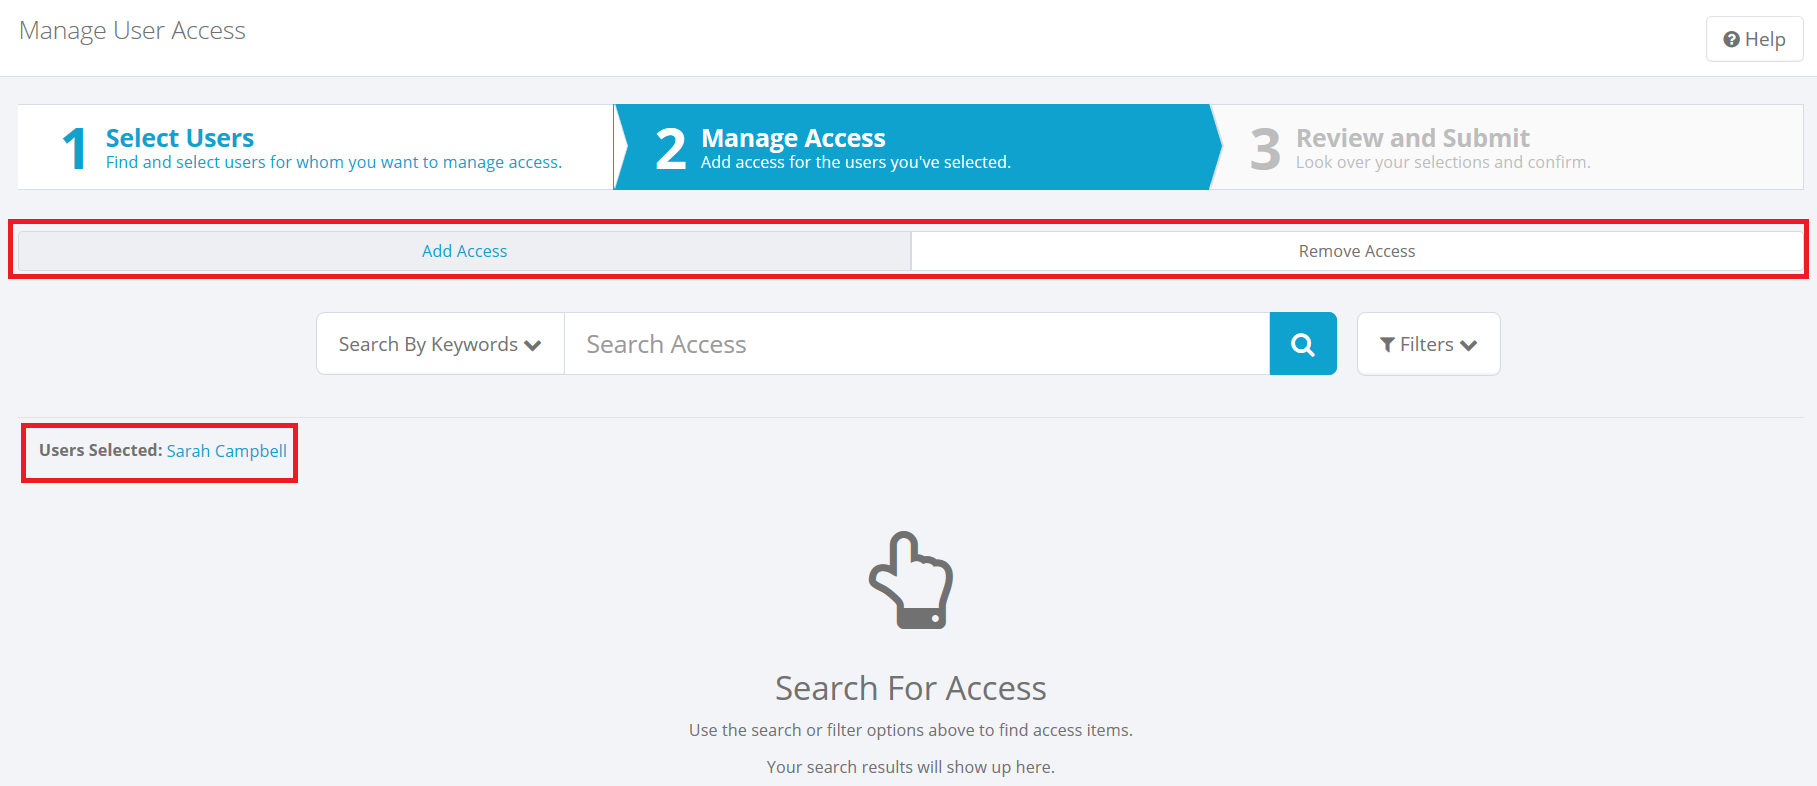
On this page, you choose the access to add or remove for a user, or the access to add for multiple users.
Changing the Selected User(s): To remove selected users from the request, click the Users Selected list of names under the search field, click X to remove each user, then click Save. To add more users, click the Select Users header to go back to the Select Users page.
Add access
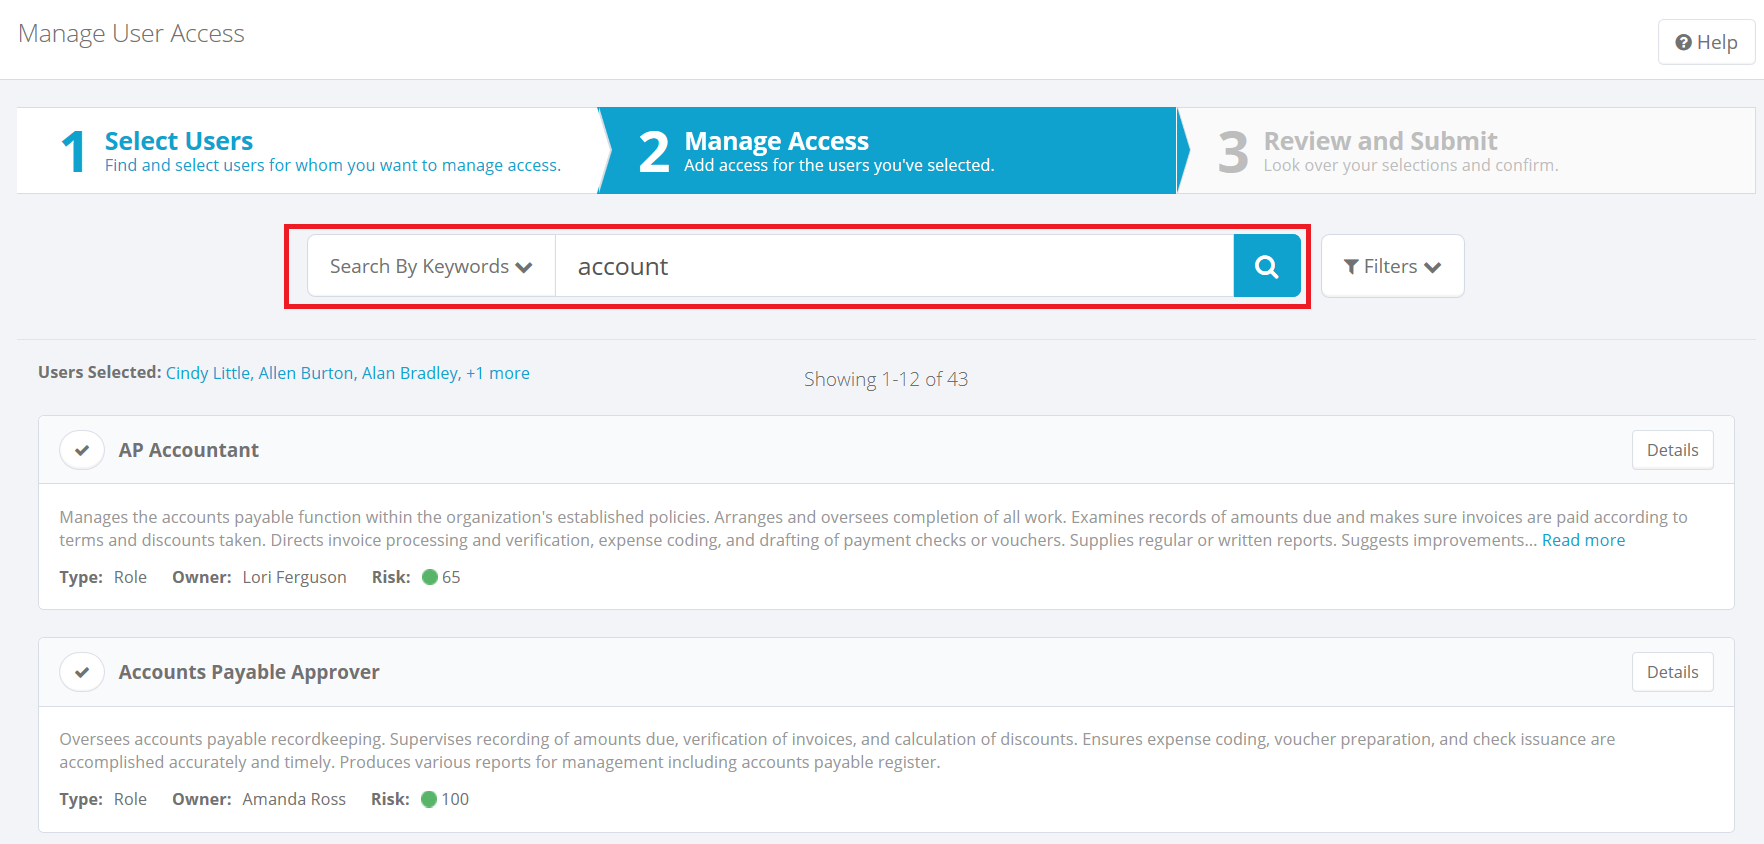
Use Search or Filter to find the access you want to request it for the selected users. Then click the checkmark icon for each item to add it to the selected users. The users you have selected are listed just below the search field. For roles, you can click Details on each role to see more information about it.
Search By Keywords: Type all or just the beginning of a keyword to search on. The search returns all access items with attributes (such as description) starting with the search term. (The specifics of which attributes can be searched is configured by your system administrator.)
Find Users’ Access: This option shows you access granted to a specific user (or multiple users), so that you can choose items from that set of access, and request those items for the user(s) in your selection. If you search on multiple users, the search results show the number and percentage of users that have each type of access. Note: this is a configurable option that may not be enabled in your particular installation.
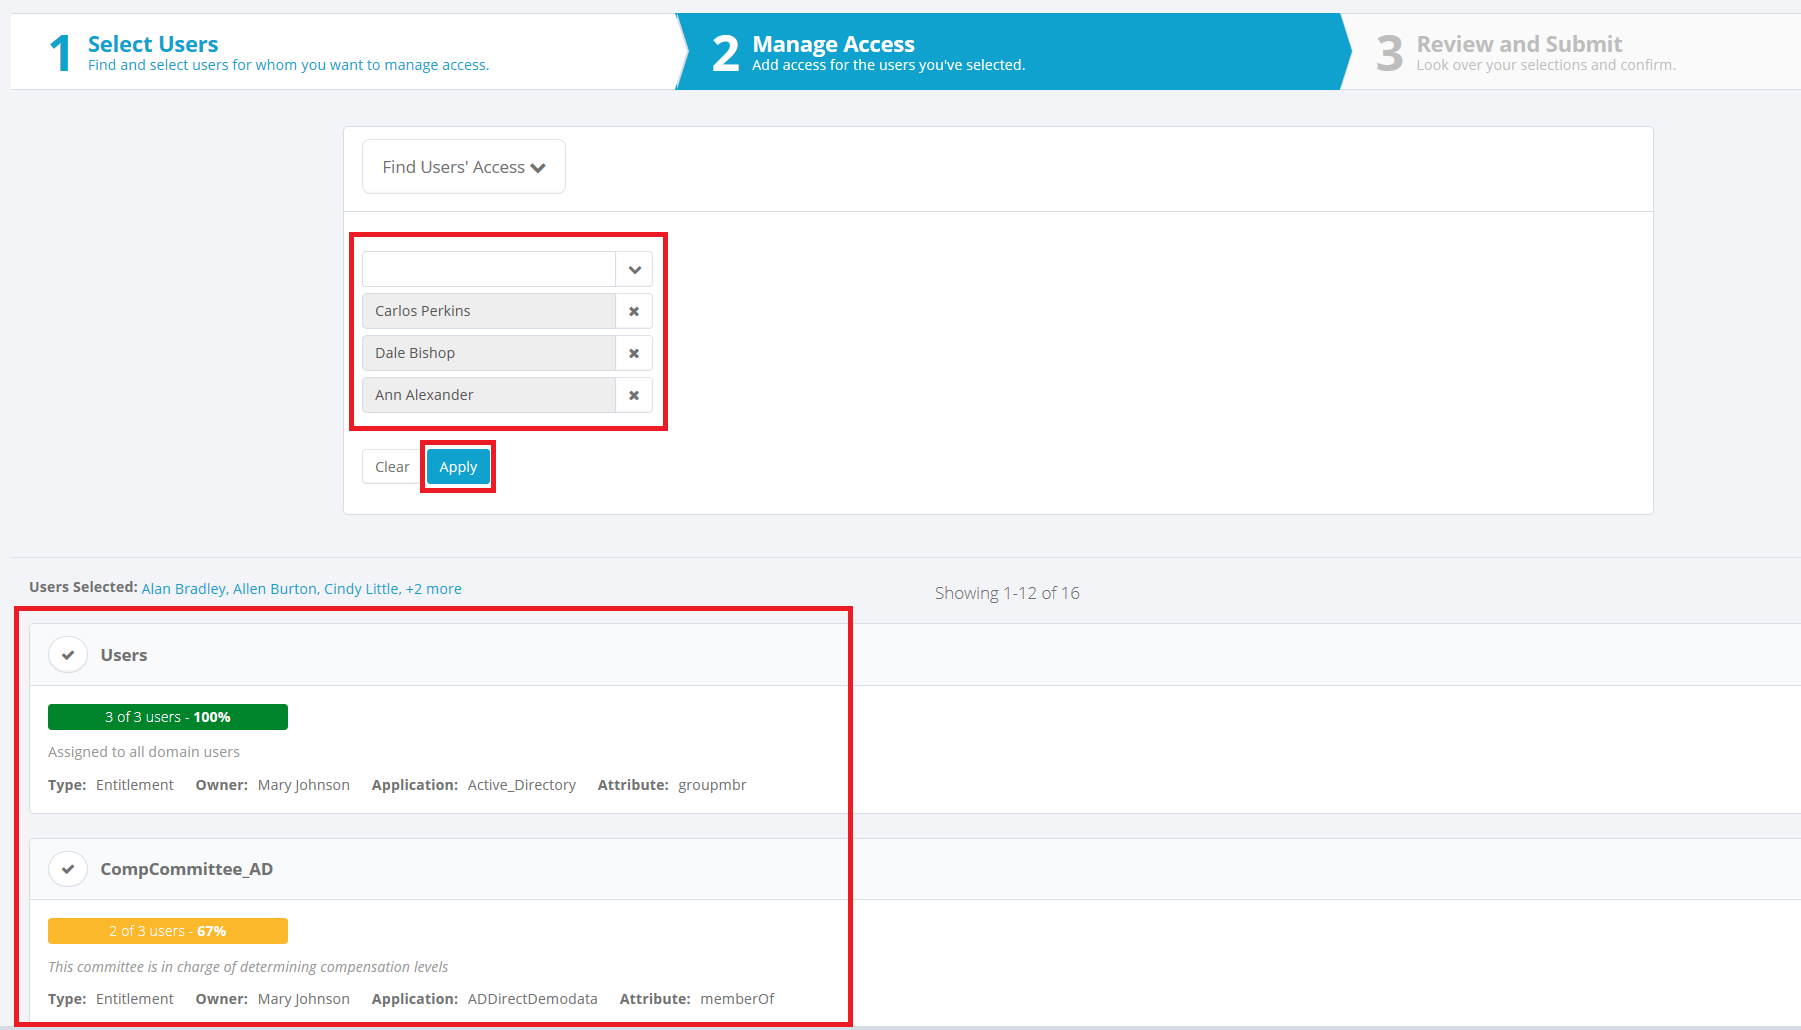
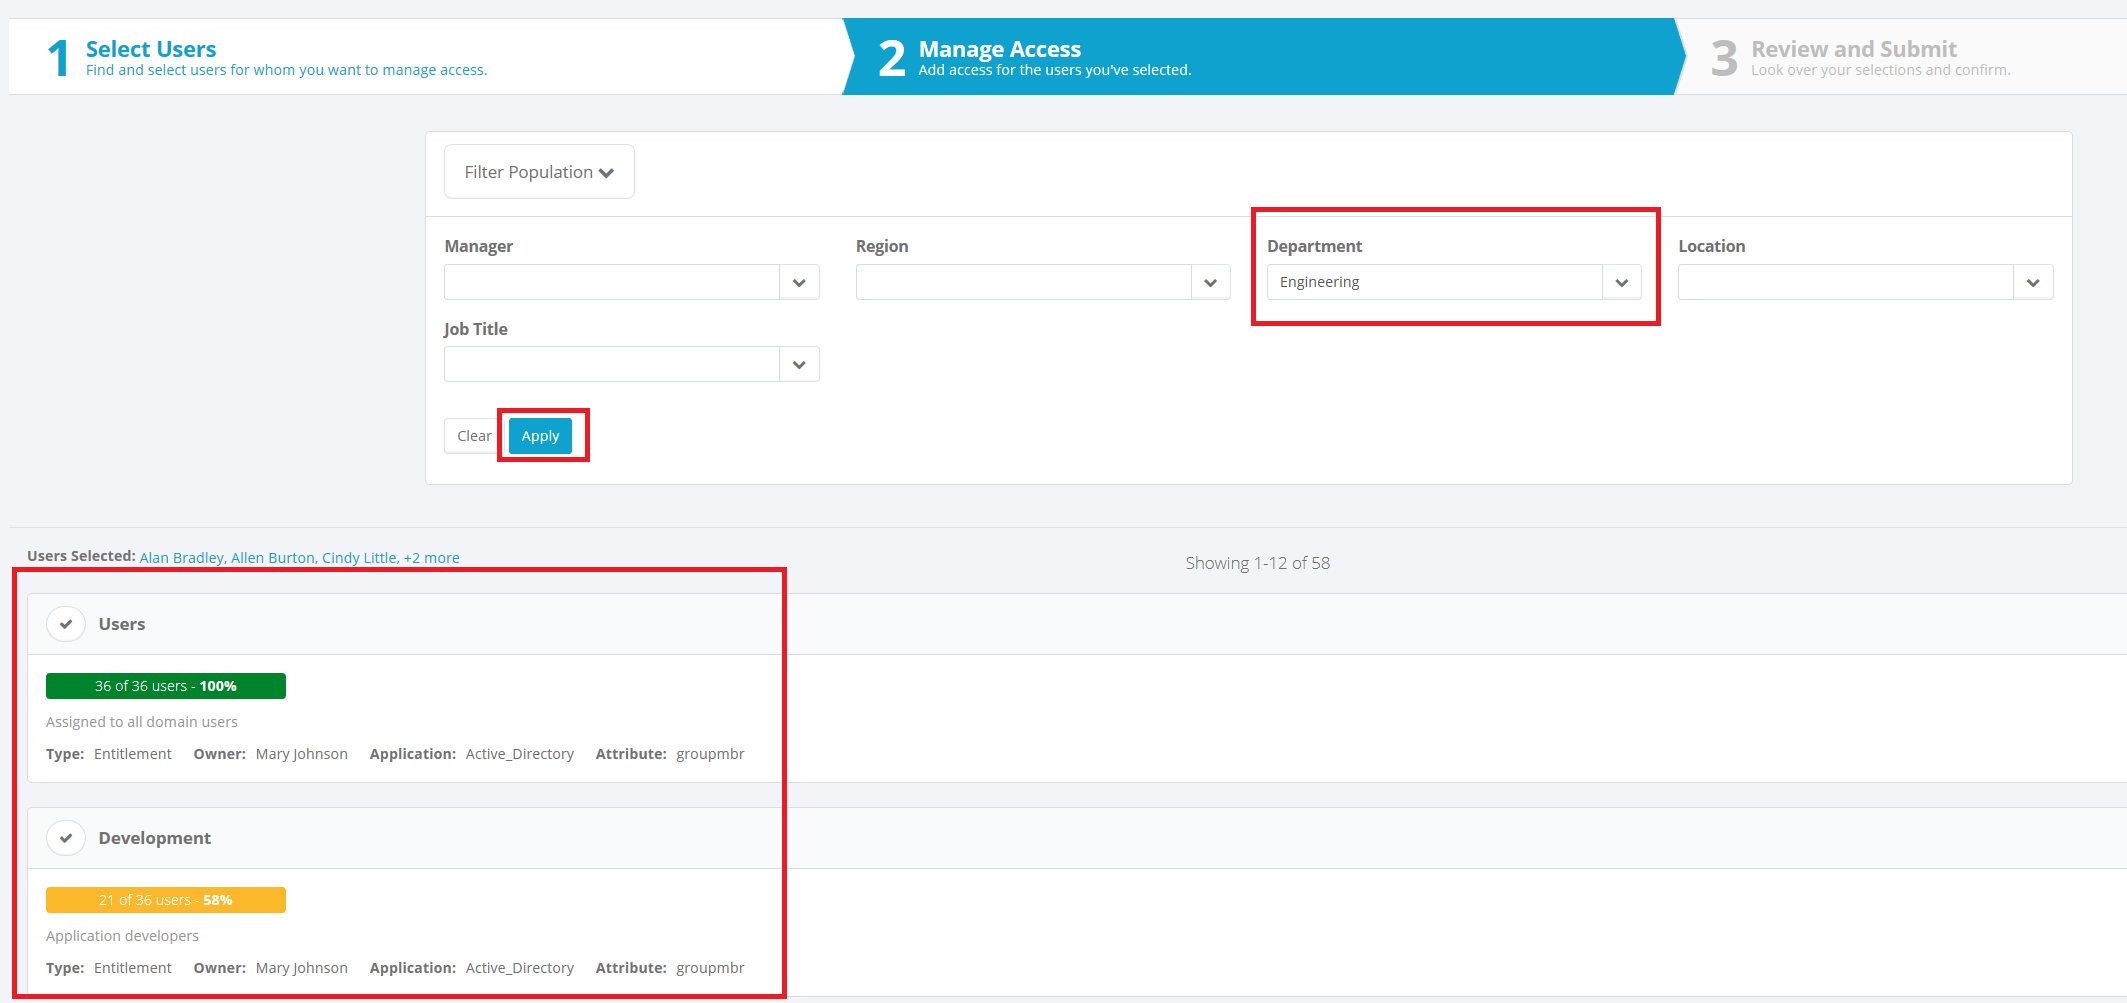
Filter Population: Use filter criteria to find users and see the access granted to them. For example, you might filter for all users in the Engineering department to see which access most Engineering employees have. Results show the number and percentage of users in the filtered population that have each type of access. Note: this is a configurable option that may not be enabled in your particular installation; also the fields for filtering populations are configurable so the filter options available to you may vary from the ones shown in this image.
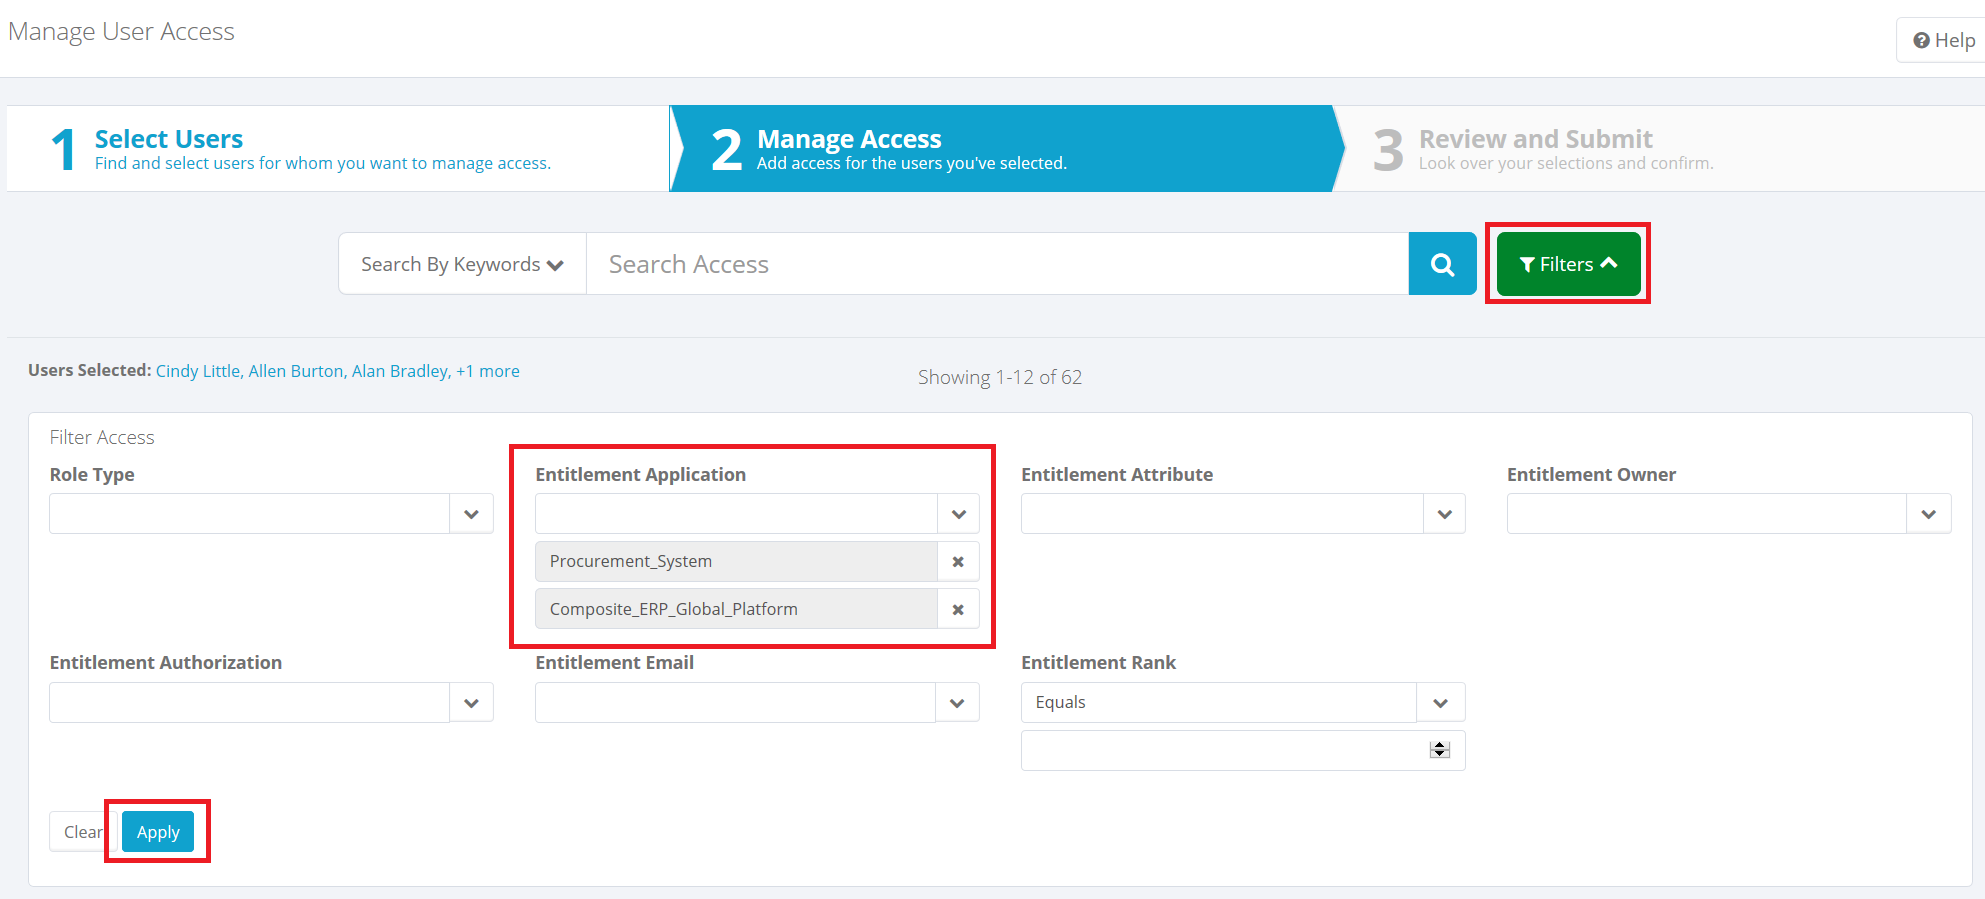
Filter: Click Filters to choose and apply filter criteria for finding access items. You can filter on any of the standard filter fields shown. To apply the filter, click Apply. When filtering is applied, the Filter button turns green, to alert you that you are seeing a filtered subset of access. To clear filtering, click the Filters button again and click Clear.
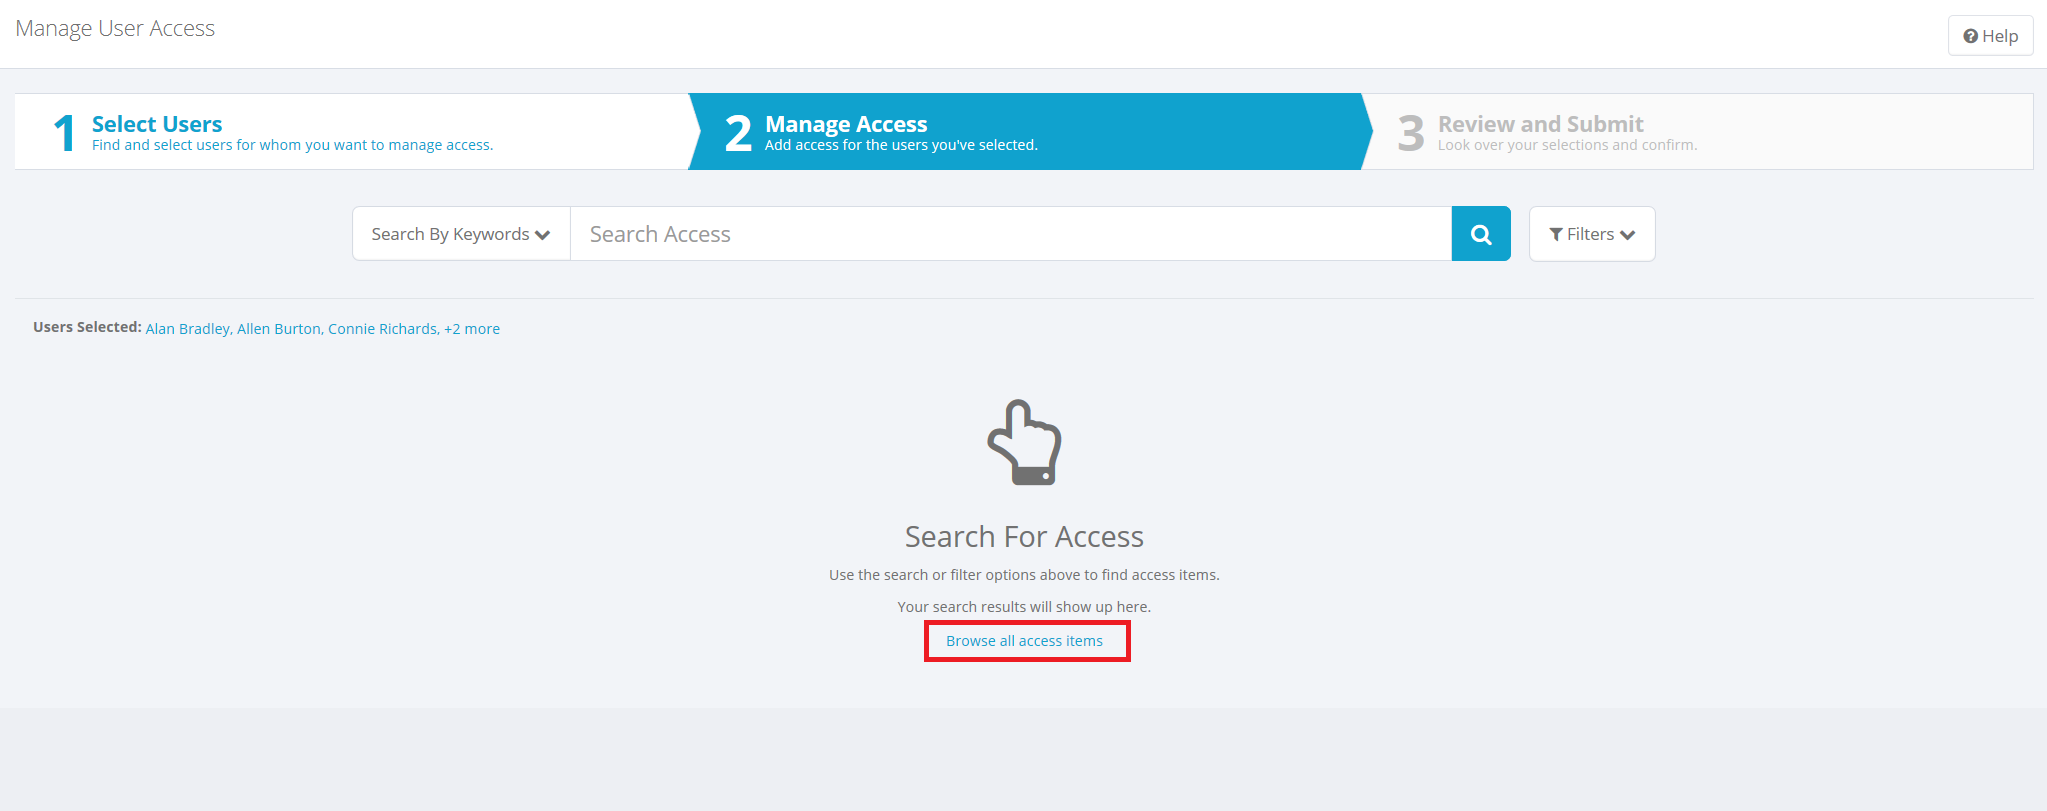
Browse all access items: To see all access items, without searching or filtering, click the Browse all access items link.
Permitted roles
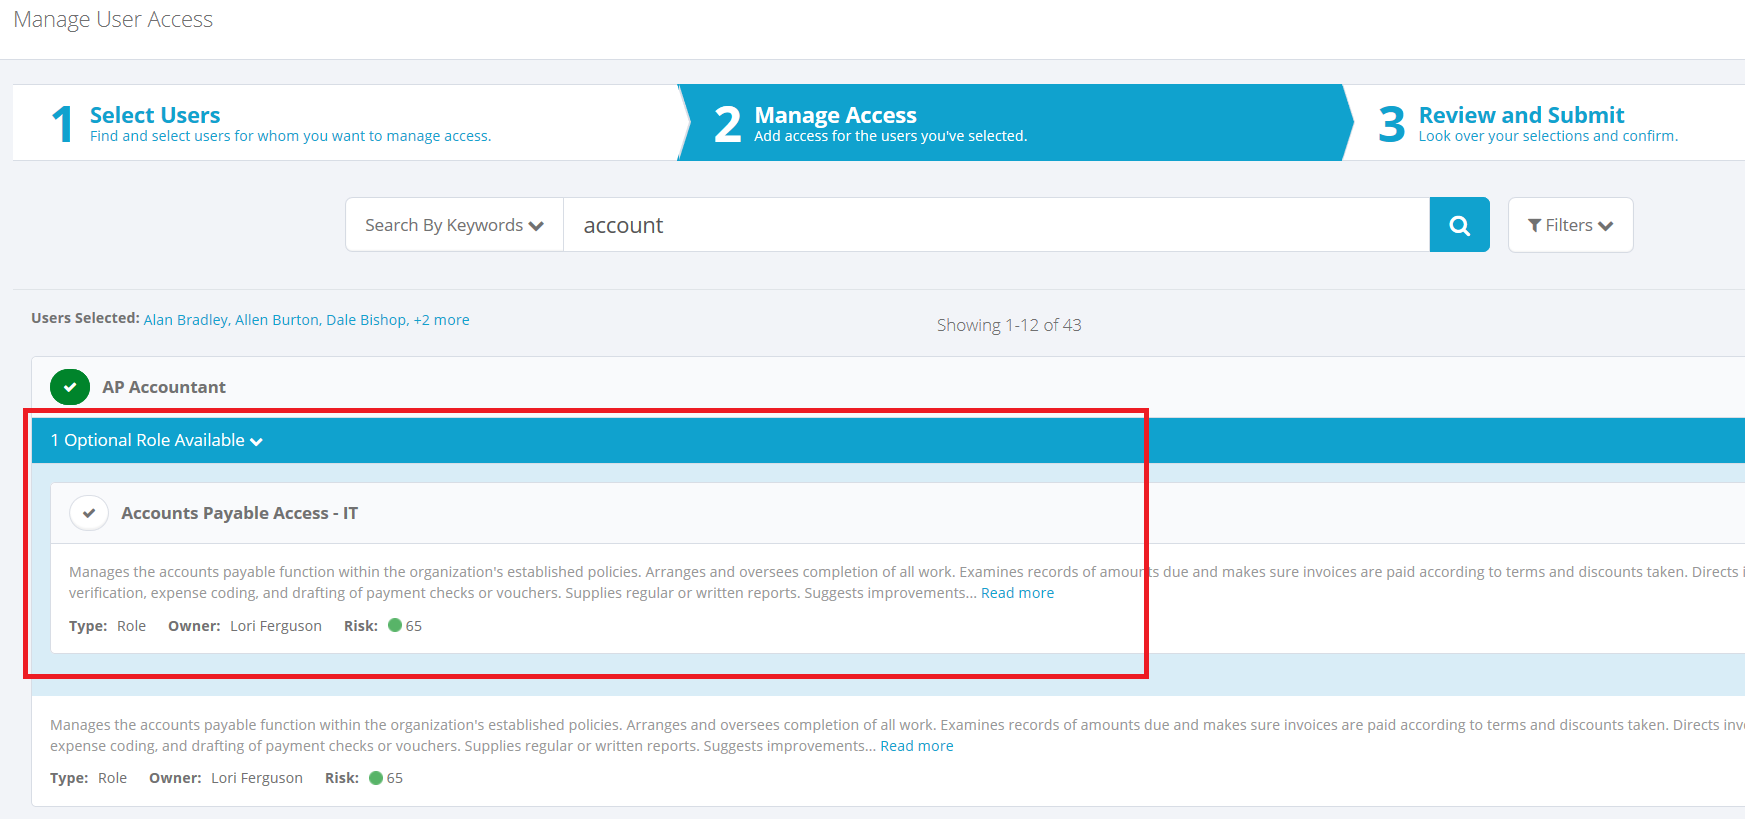
If you select a role that permits additional roles, you are alerted that additional, optional roles are available, and can select any of them to add to the request.
Selecting or creating accounts
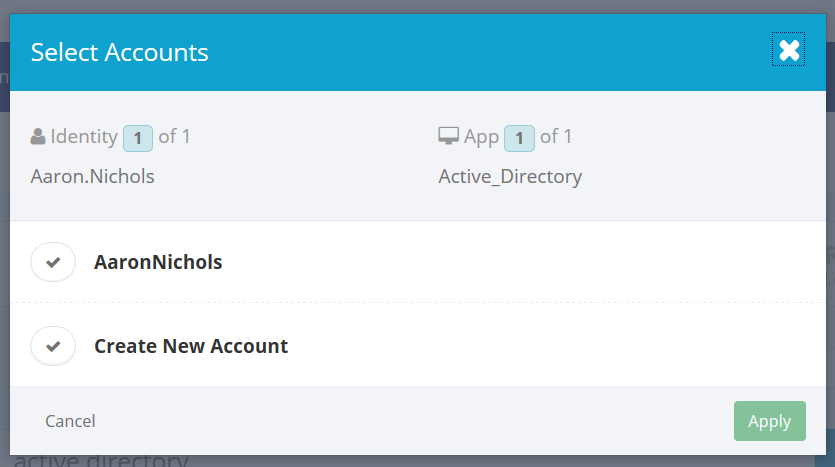
If a user you have selected has multiple accounts on the application associated with the access you are requesting, you are prompted to choose which account to add the access to.

If your system is configured to let you request a new account for a user as part of an access request, you are prompted to choose whether you want to add access to the user’s existing account or to create a new account.
Remove access
The option to remove access is available only when a single user is selected. If you have selected multiple users, you will not see the Remove Access option.
To remove access from the user, first click Remove Access in the header area. Then click the X icon for each item to remove it from the user. A red badge with a number, on the Remove Access menu, shows you how many items have been selected for removal.
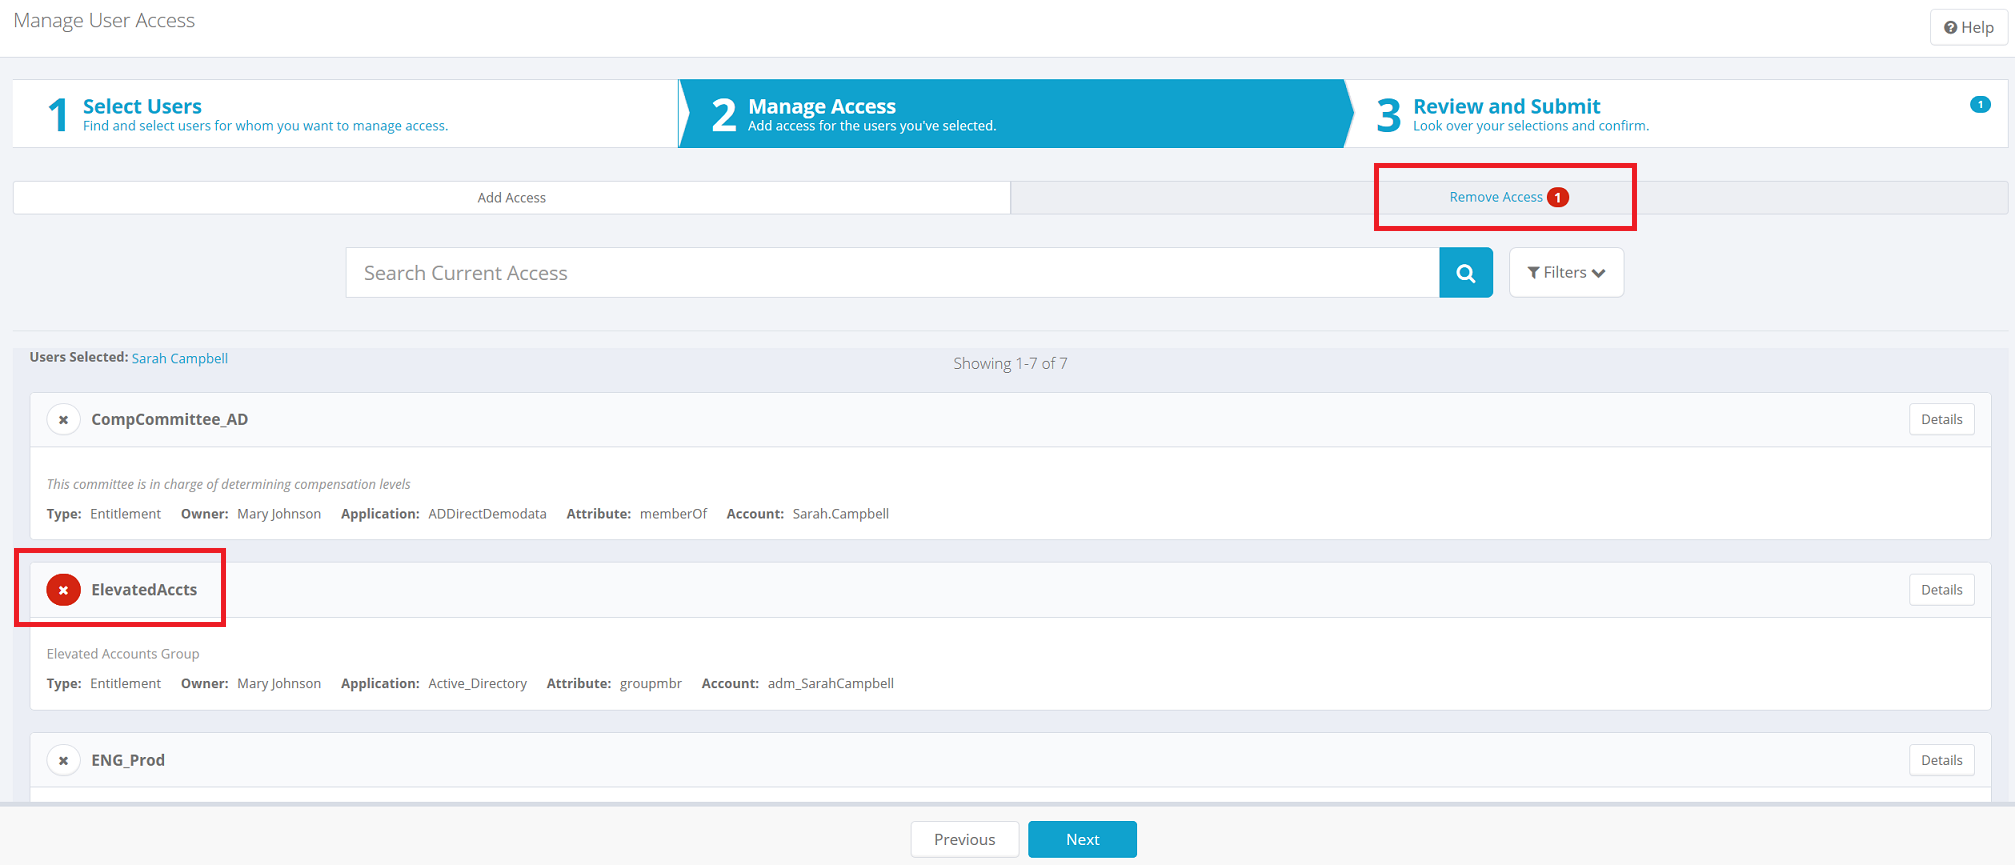
Click Next to move on to the Review and Submit page.
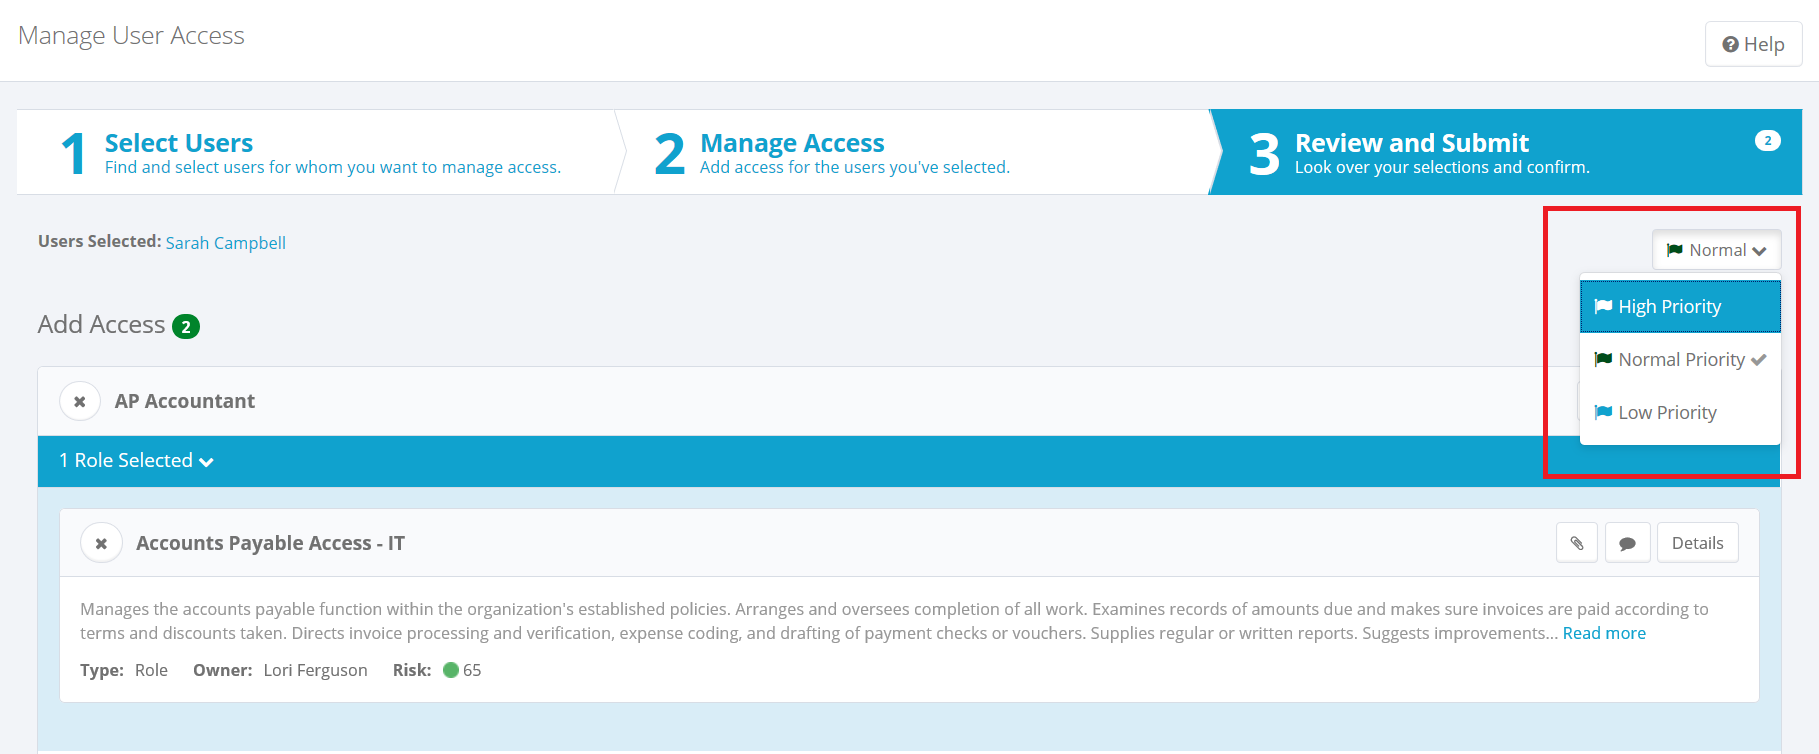
Review and submit
Priority: If your system is set up to allow requesters to set a priority level for access requests, you can change the priority for this request. The default setting is Normal Priority. When you create an access request, you can change the priority to High Priority or Low Priority
Administrators: Priority editing is enabled via the gear menu > Lifecycle Manager > Configure > General Options.
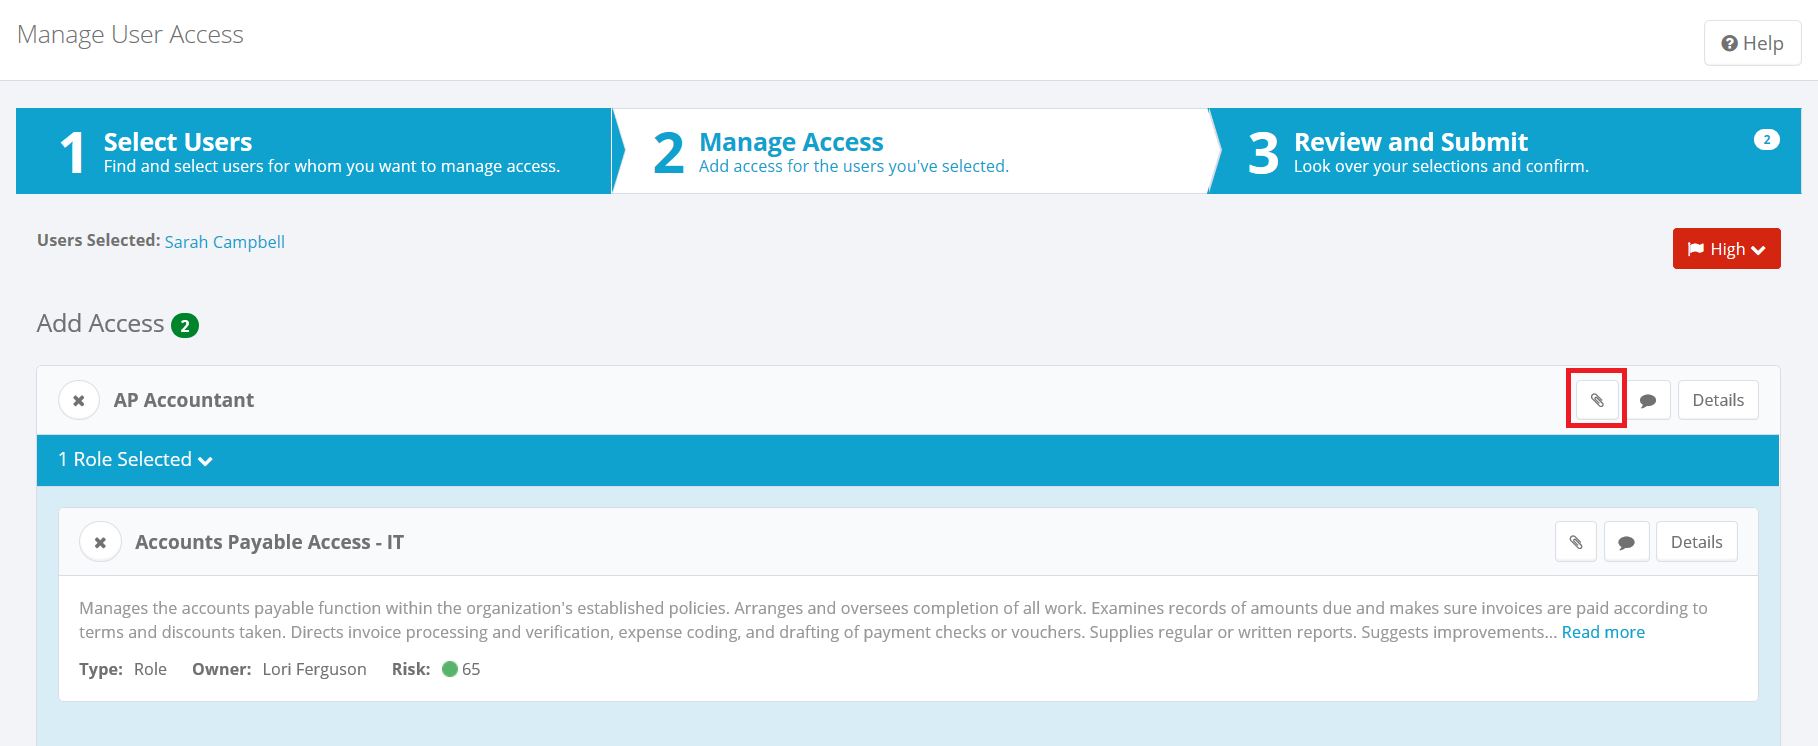
Add attachments: If your system is set up to allow attachments, you can click the paper clip icon to add attachments to the request. Attachments are available only when you are requesting access for a single user. In some cases, attachments can be required, based on the type of user the request is for, or the type of access being requested; when an attachment is required, the attachment icon can include text indicating that it is required.
Size and file type limitations for attachments are configured by your system administrator.
The attachments option was introduced in version 8.0 of IdentityIQ and is not available in earlier versions. Read more about this feature at IdentityIQ 8.0: File Attachments in Access Requests
Administrators: Attachments are enabled via the gear menu > Global Settings > Miscellaneous. Read more about enabling attachments at IdentityIQ 8.0: File Attachments in Access Requests
Comments and Assignment Notes: Click the comments icon to add comments and assignment notes.
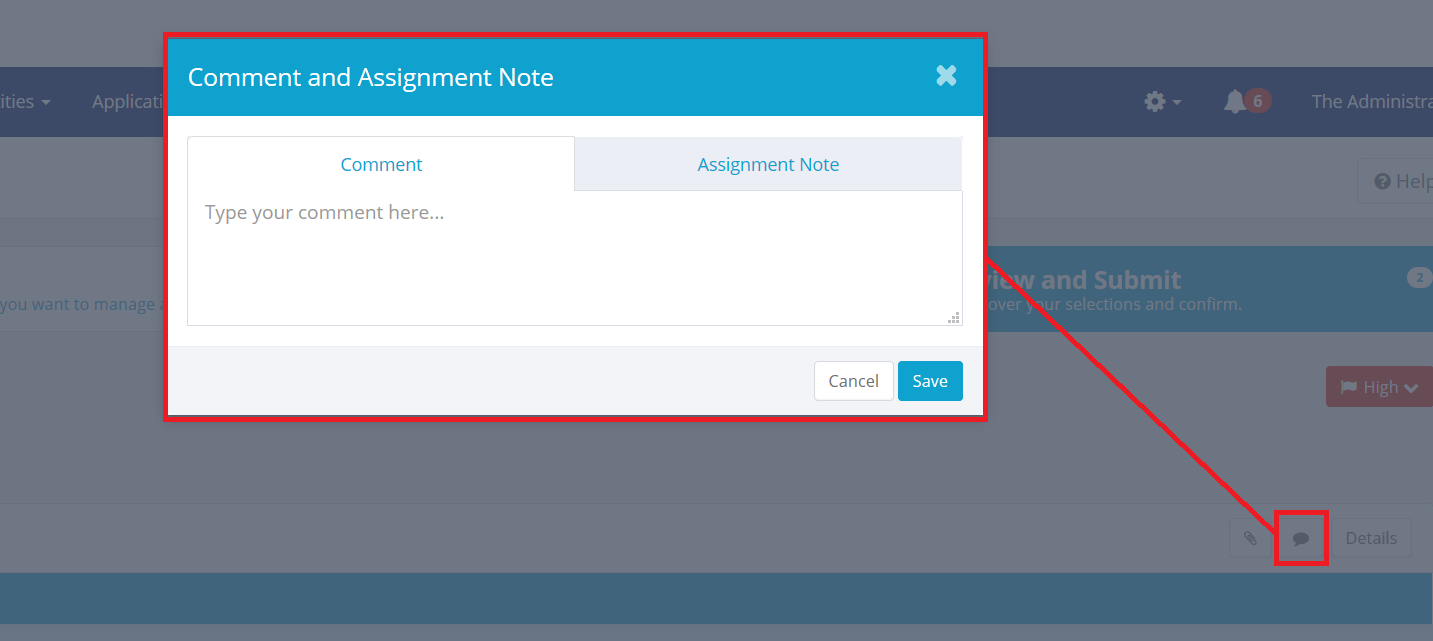
- Comments can be added and viewed throughout the request and approval cycle. Approvers can view the comments that are added as part of the request, and add their own during the approval phase.
- Assignment Notes are available only for Role assignments. They are similar to comments in that they can be viewed by reviewers, but unlike comments, assignment notes are saved with the role assignment information that is stored on the user’s identity.
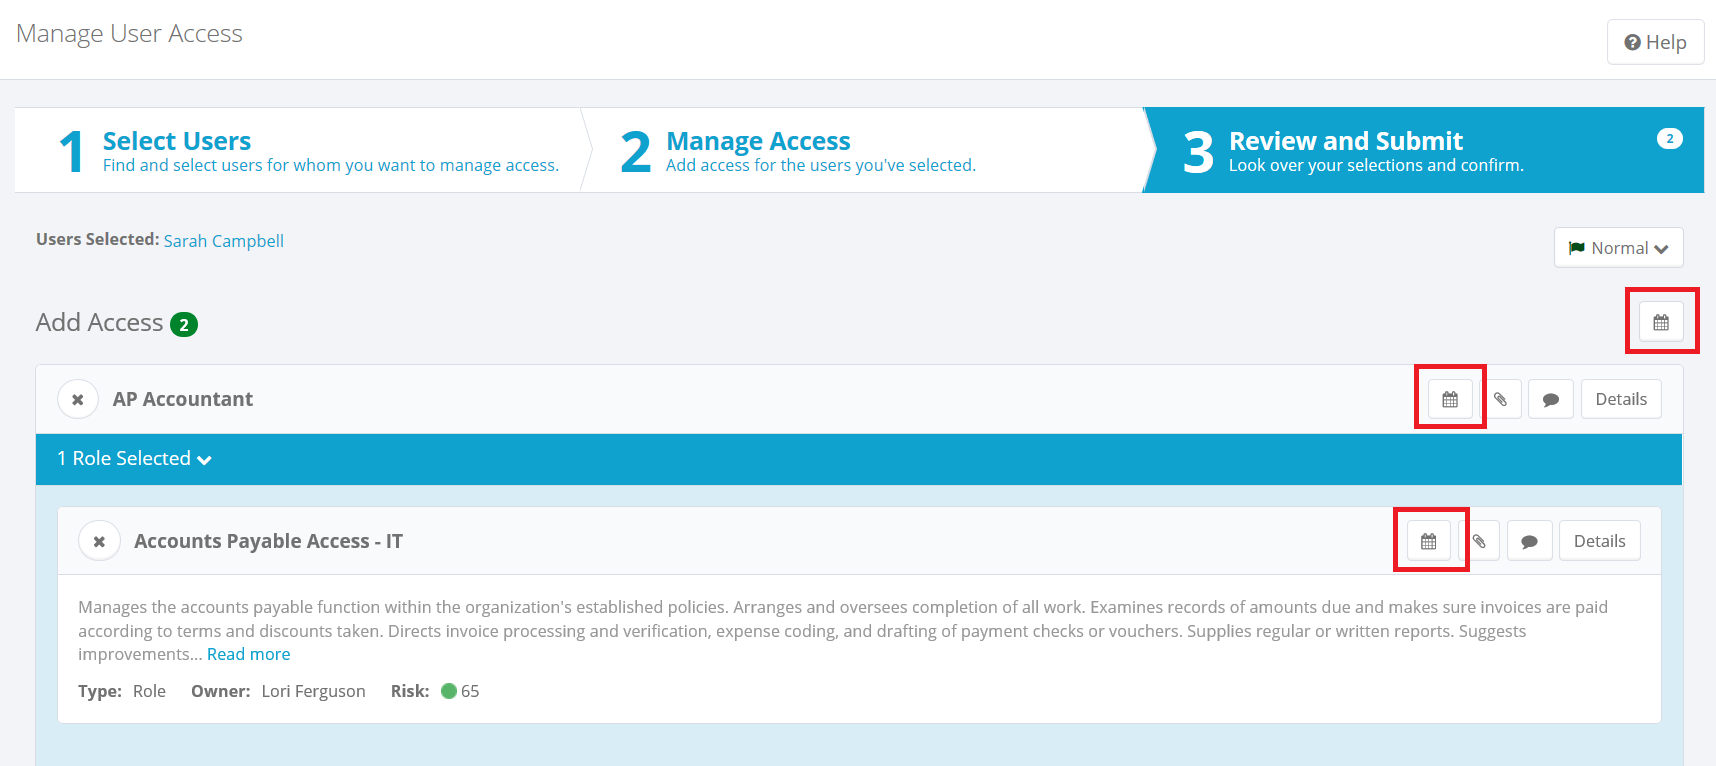
Sunrise/Sunset Dates: If your system is set up to allow sunrise (assignment) and sunset (deprovisioning) dates for roles and entitlements, you can click the Calendar icon to set these dates. Sunrise and sunset dates can be set at the overall request level, or individually for each request item.
Administrators: Sunrise/sunset dates are enabled via the gear menu > Global Settings > IdentityIQ Configuration > Roles.
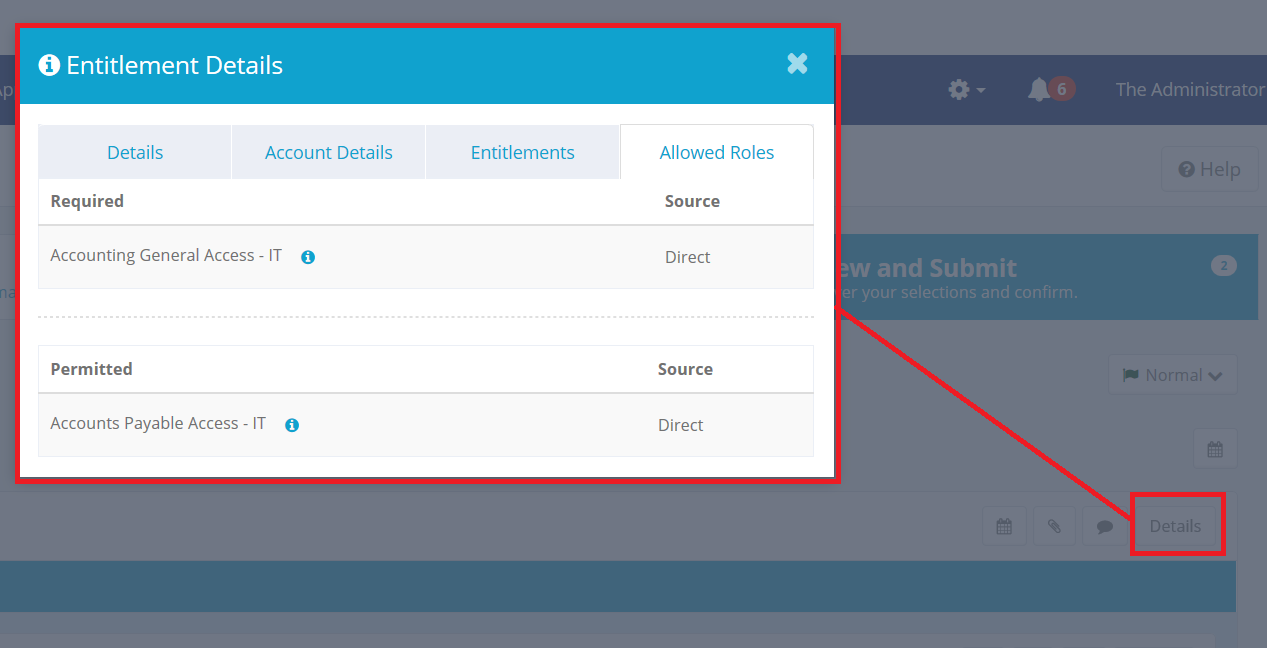
Details: For any role, click Details to see information such as the application associated with the role, the Attribute, the Name of the role, and how the role was assigned. Before you submit the request, you can use the navigation bar to return to the Select Users and Manage Access pages to make changes. Some changes, such as adding more users to the request, may reset some of the selections you have made.
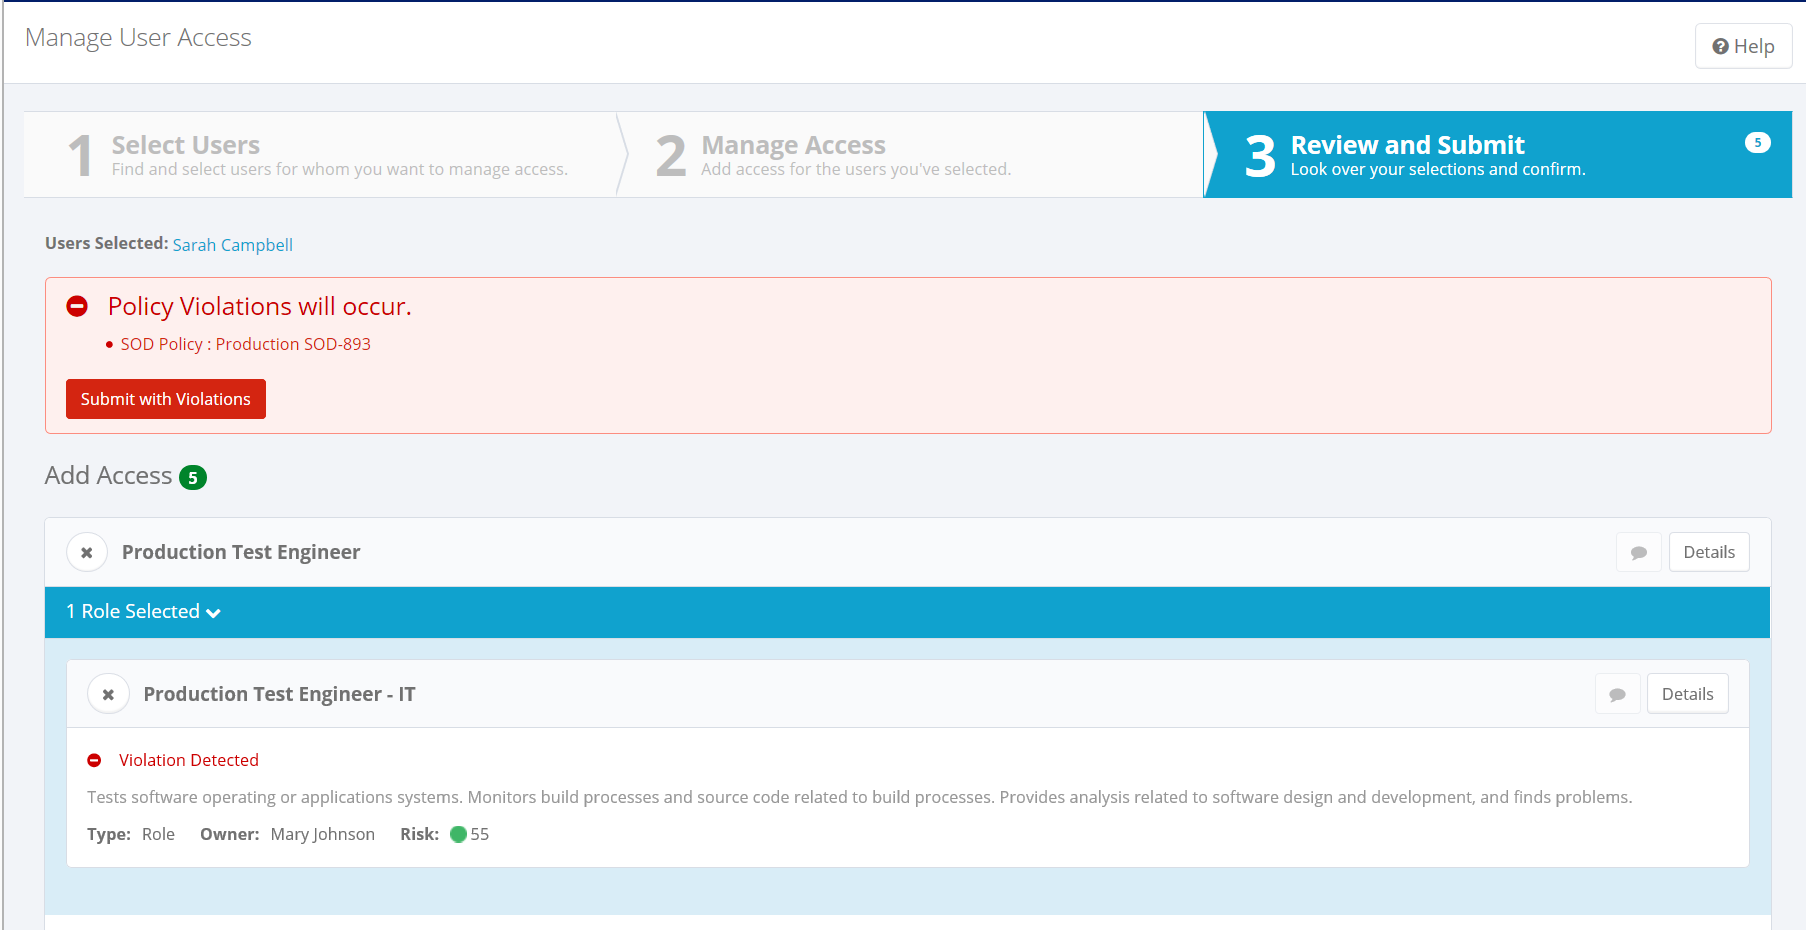
Policy violations
IdentityIQ can be configured to alert you if your request will result in a policy violation. Depending on how your installation is configured, if your request results in access that would violate one of your company’s defined policies, the system will prompt you with that information and suggest that you change the request details. You can choose to change the request to remove one or more of the conflicting items, or you can submit the request with the violation. You can also click on the policy violation rule name to see details about the violation, including compensating controls and correction advice.
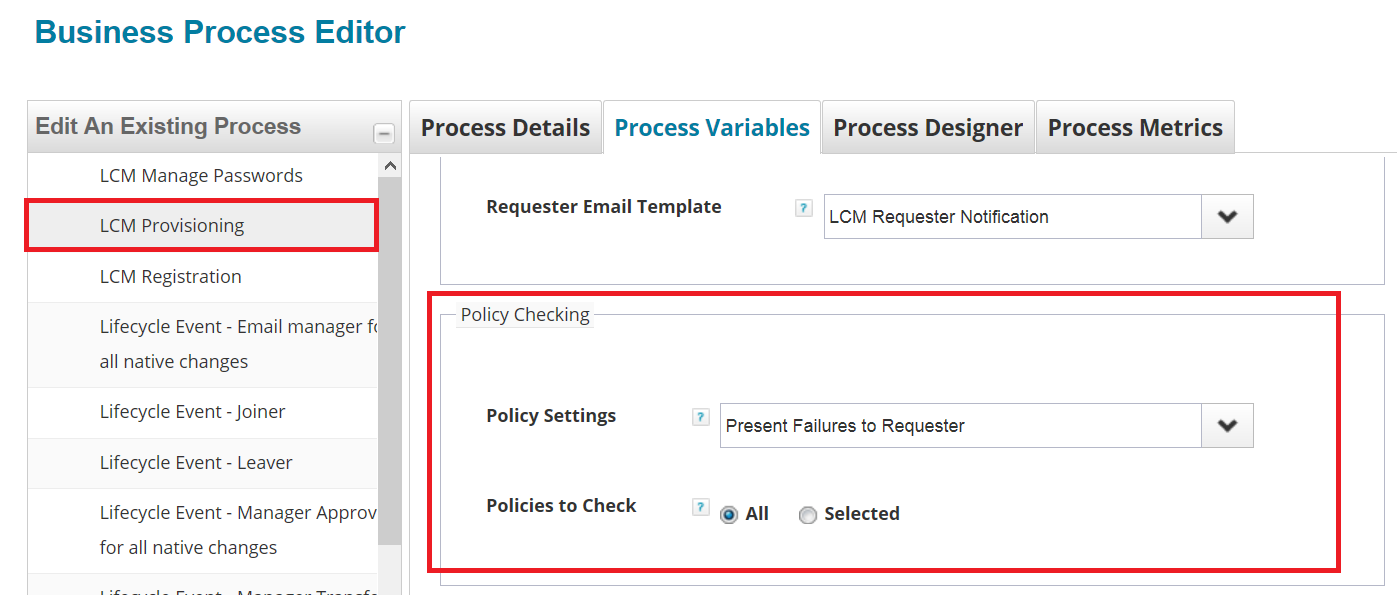
Administrators: The option to alert requestors to potential policy violations is set in the business process that manages provisioning. To present policy violations to the requester, change the Policies to Check variable to Present Failures to Requester.
Submitting the request
When you are ready to submit the request, click Submit.
Additional information
- Mark as Read
- Mark as New
- Bookmark
- Permalink
- Report Content to Moderator
To enable this please make sure that you have imported init-lcm.xml.
- Mark as Read
- Mark as New
- Bookmark
- Permalink
- Report Content to Moderator
Is there any option to allow users to select multiple users or not while selecting users before requesting access?
- Mark as Read
- Mark as New
- Bookmark
- Permalink
- Report Content to Moderator
Hello Experts,
Which logger will help to identify search query with keyword in Manage User Access.
For example if we are searching with a keyword Dbc, instead below 2 entitlements only 1 is coming.
Abc Bbc Cbc Dbc
Abc Bbc Dbc
Any help should be appreciable.
Thanks,
Chakravarthi
